2.4 KiB
Connecting With The websocket.
The reason.
During our project we needed more esp's to connect to the websocket, so i was given the task to make a connection to wifi, connect to the websocket, and then send information to it.
Before the setup.
I used library's for: connecting to multiple wifi's, connecting to the websocket and being able to read infromation form a DHT11. These were called uppon in the first few lines.
Together with this a few variables are named to be used later in the code.
The Setup
Firstoff, start with identifying which serial port will be used and work from there. It Then tells the DHT to send a test message and start it up.
Then the several wifi connections get told here and it looks for the one that connects. (This is made bij giving the wifi name and pasword) In this sequence a print is made, showing that there is an atempt to connect to a wifi.
*This was used because the node should be able to connect to several wifi's and not be stuck t one in perticulair.
After the wifi is connected it sends a print to indicate a connection and pings the ip adress of the used wifi.
The websocket connection which was then made is made using the uri, port, and type of connection. In case of websocket events it gets sent. In case of connection failiure, try this.
The loop
We start with setting a timer because a "delay" function would break the connection with the websocket resulting in an error.
This relates back to some some variables that were made in the beginning.
We make variables for the different results we are gathering, so these can be used later.
Then the variables get printed for overview.
To ensure the websocket connection , the process gets looped.
Update File.
Here the text thathas te be sent to the websocket gets sent.
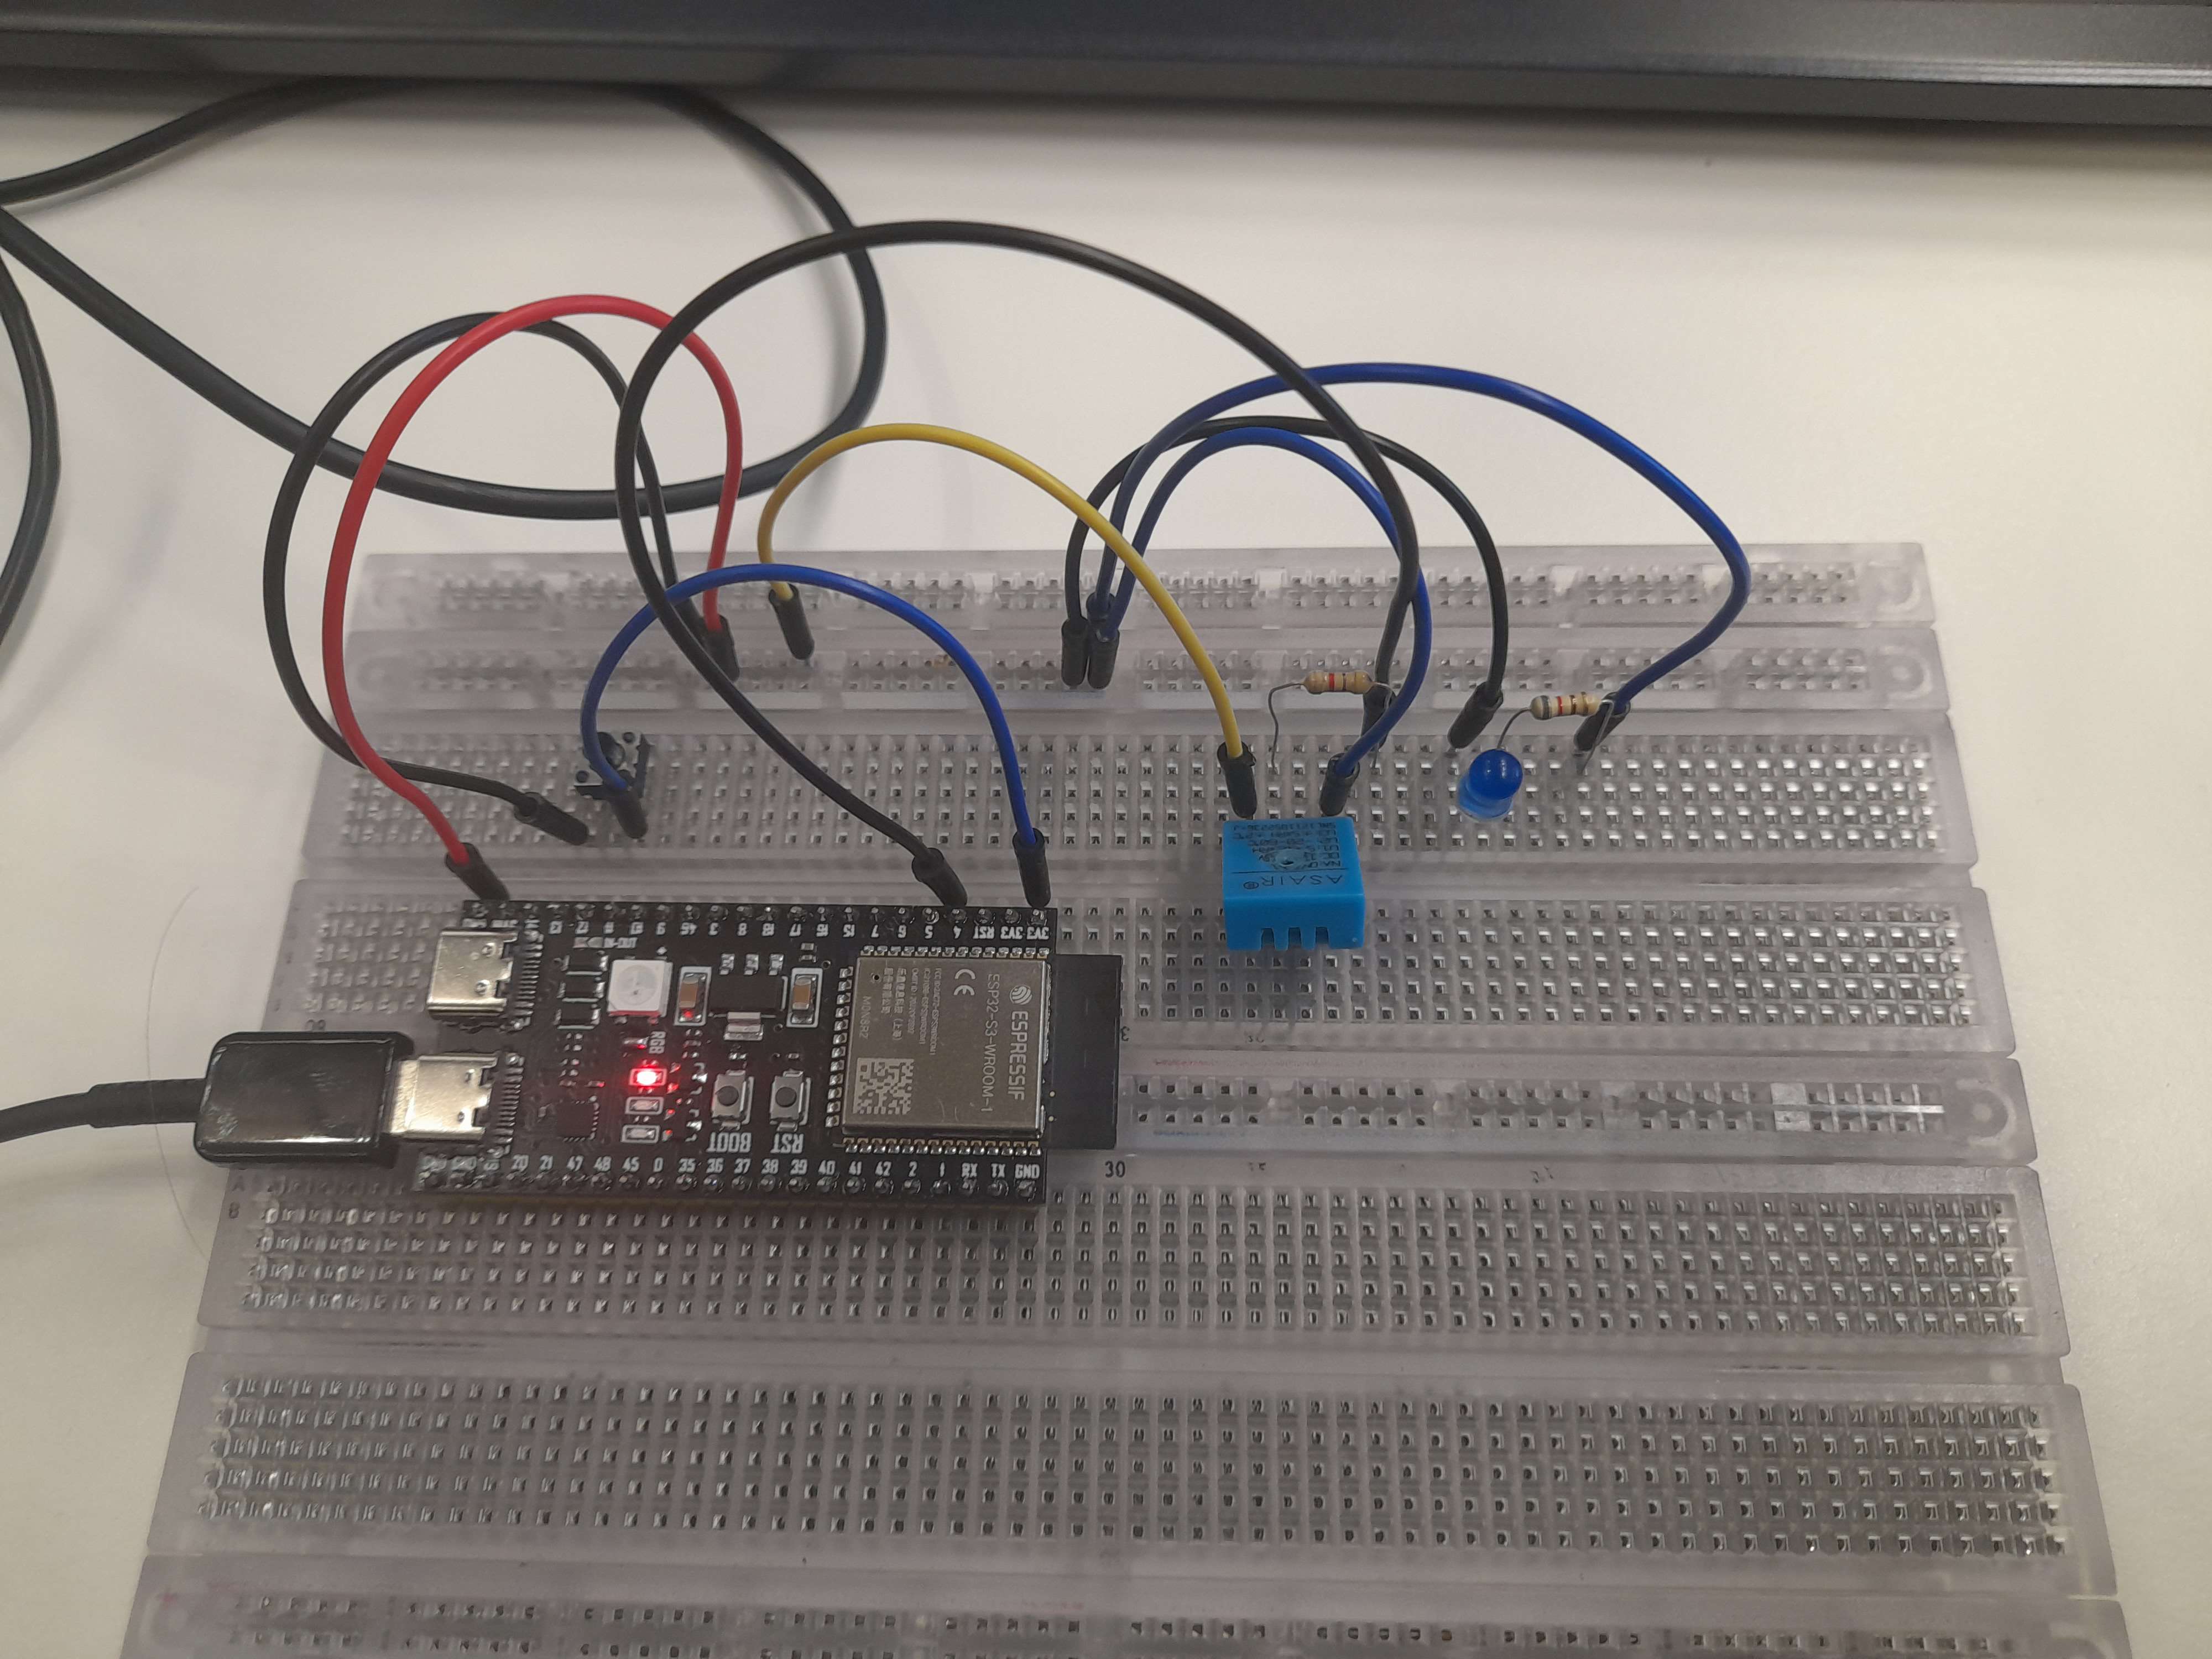
The fysical product.
it is shown here:
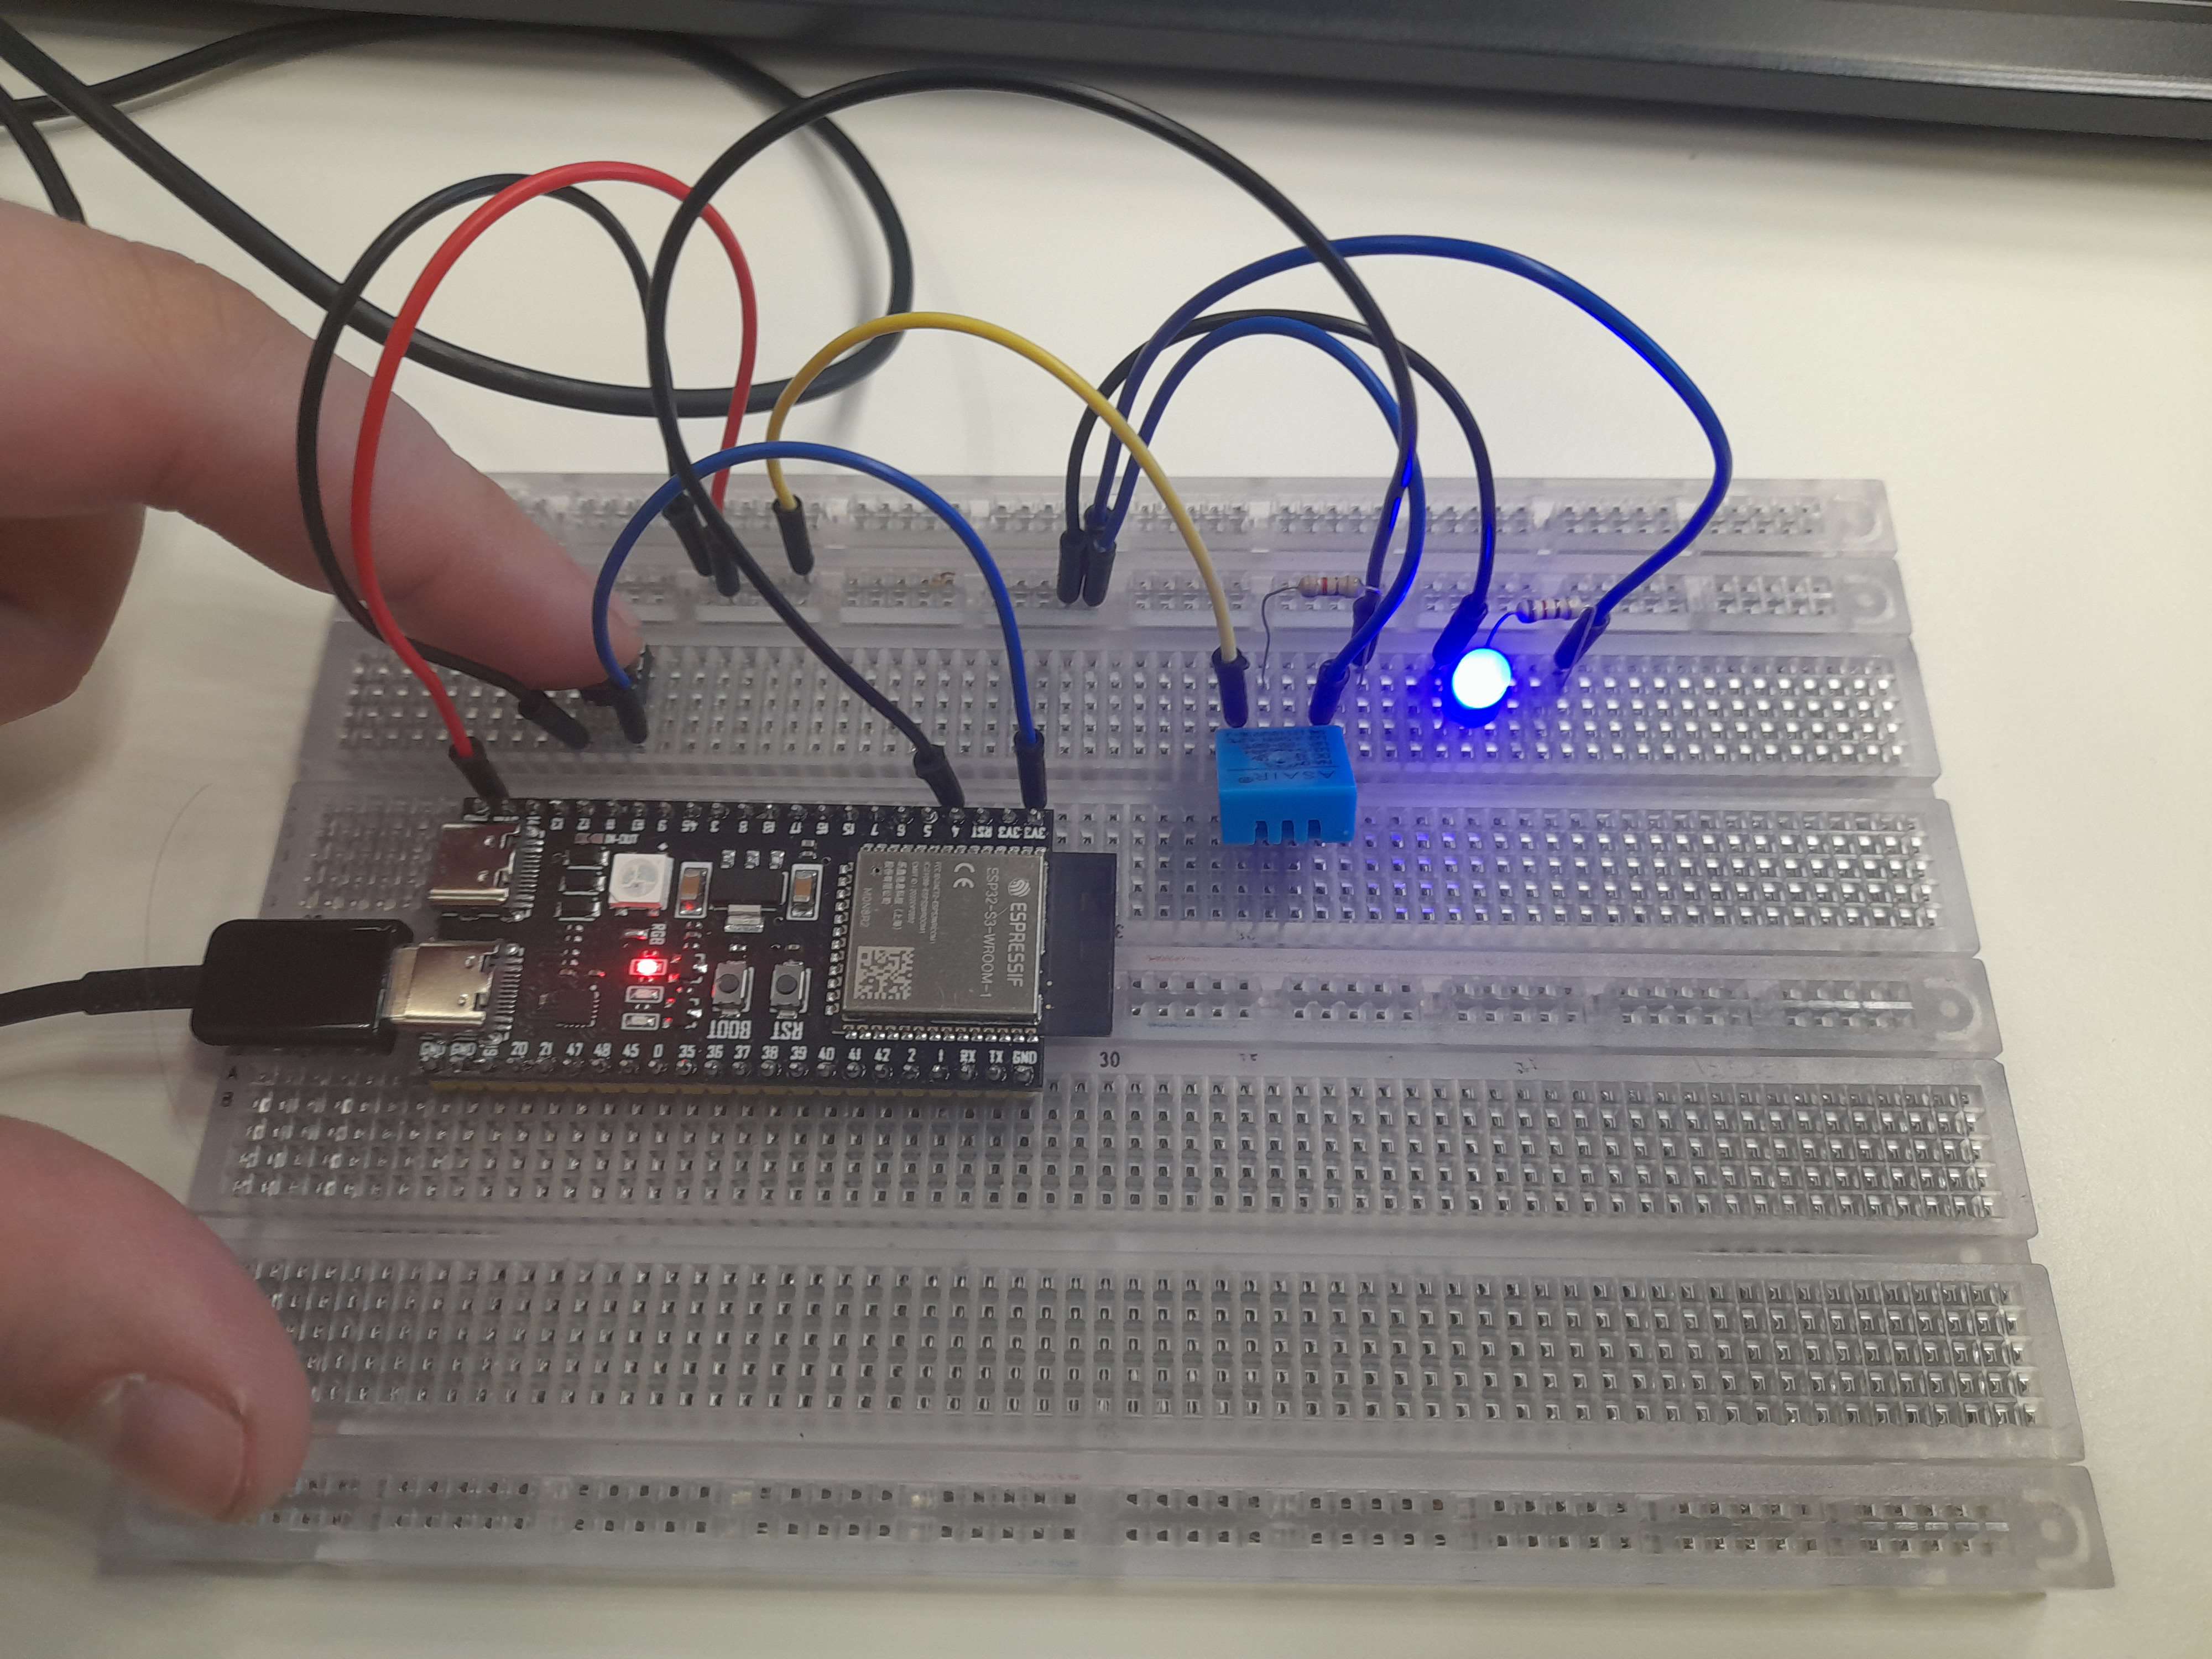
 It also turns on:

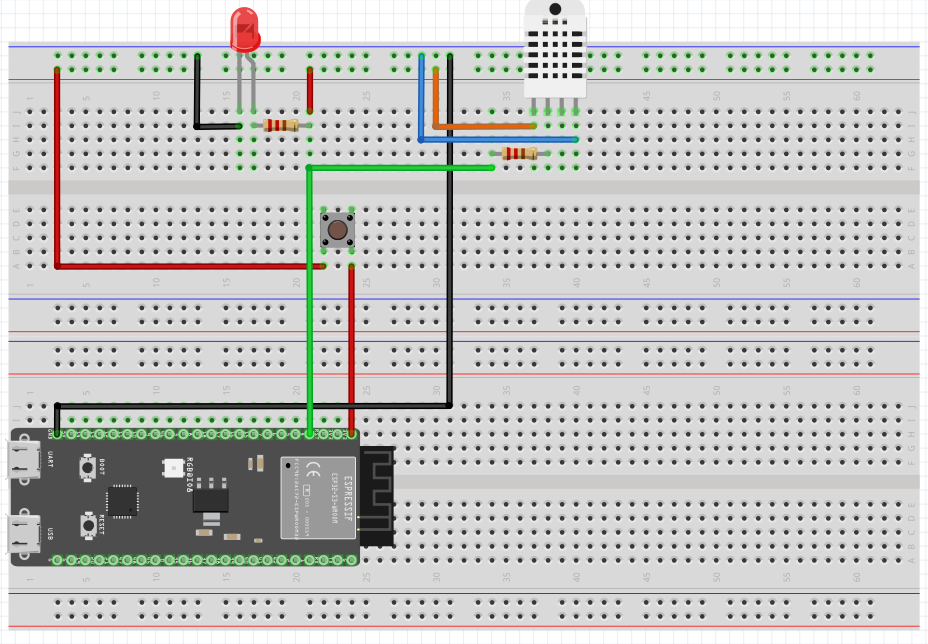
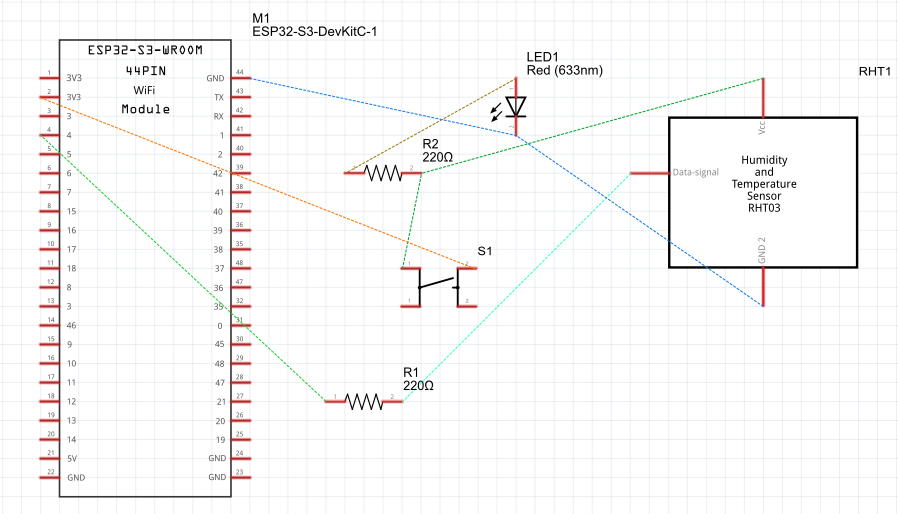
Here are my fritzing and wireframe, the components used are shown but The DHT11 is replaced by a DHT22.


The code.
Here the c++ code is shown: https://gitlab.fdmci.hva.nl/propedeuse-hbo-ict/onderwijs/2023-2024/out-a-se-ti/blok-3/qaajeeqiinii59/-/blob/main/docs/LearningProcessBram/ArduinoExperience/NodeWithWebConnection.ino?ref_type=heads